Firmware Flasher Tab
This tab is used to update the flight controller's Firmware.
For Betaflight 4.4 and above, firmware updating uses an online build process. The user selects their flight controller, the code version to flash, and enables the features they want. A custom firmware 'hex' file is then built online, downloaded, and installed onto the flight controller.
Preparation
- Upgrade to the latest Betaflight App.
- Before upgrading a flight controller, choose either
save backupfrom the Presets Tab, or save a diff file via the CLI. This will store the configuration as used by your old firmware, in case you have to revert back to the old firmware. The CLI status command provides info about the hardware currently being used.
To revert to previous firmware, the same online process would apply, but you would choose the original firmware version, and then restore your saved diff file.
Configurator only supports Betaflight version 4.0 and newer. Older versions of Configurator may be needed to flash older firmware.
Basic Flashing Procedure
This will ALWAYS erase all previous configuration data from the flight controller!
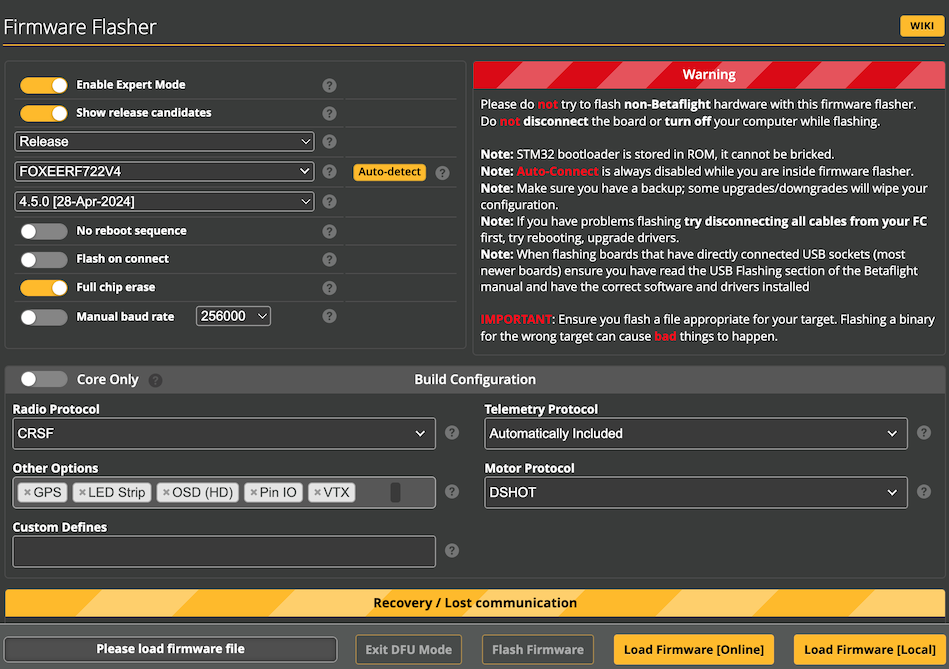
To flash a final release version of the firmware:
- leave
Enable Expert ModeOFF - leave
Show Release candidatesOFF - Click 'auto-detect' and ensure the correct board name appears in the list
- Choose the firmware version to flash
The Build Configuration area then appears:
- Choose the Radio Protocol... include telemetry if not automatically included
- Enable other hardware options, eg OSD, VTX, GPS, LEDStrip etc
The screen should look something like this, for a JHEF411 with ELRS, GPS, LEDstrip, Mag, OSD (SD) and VTx included:
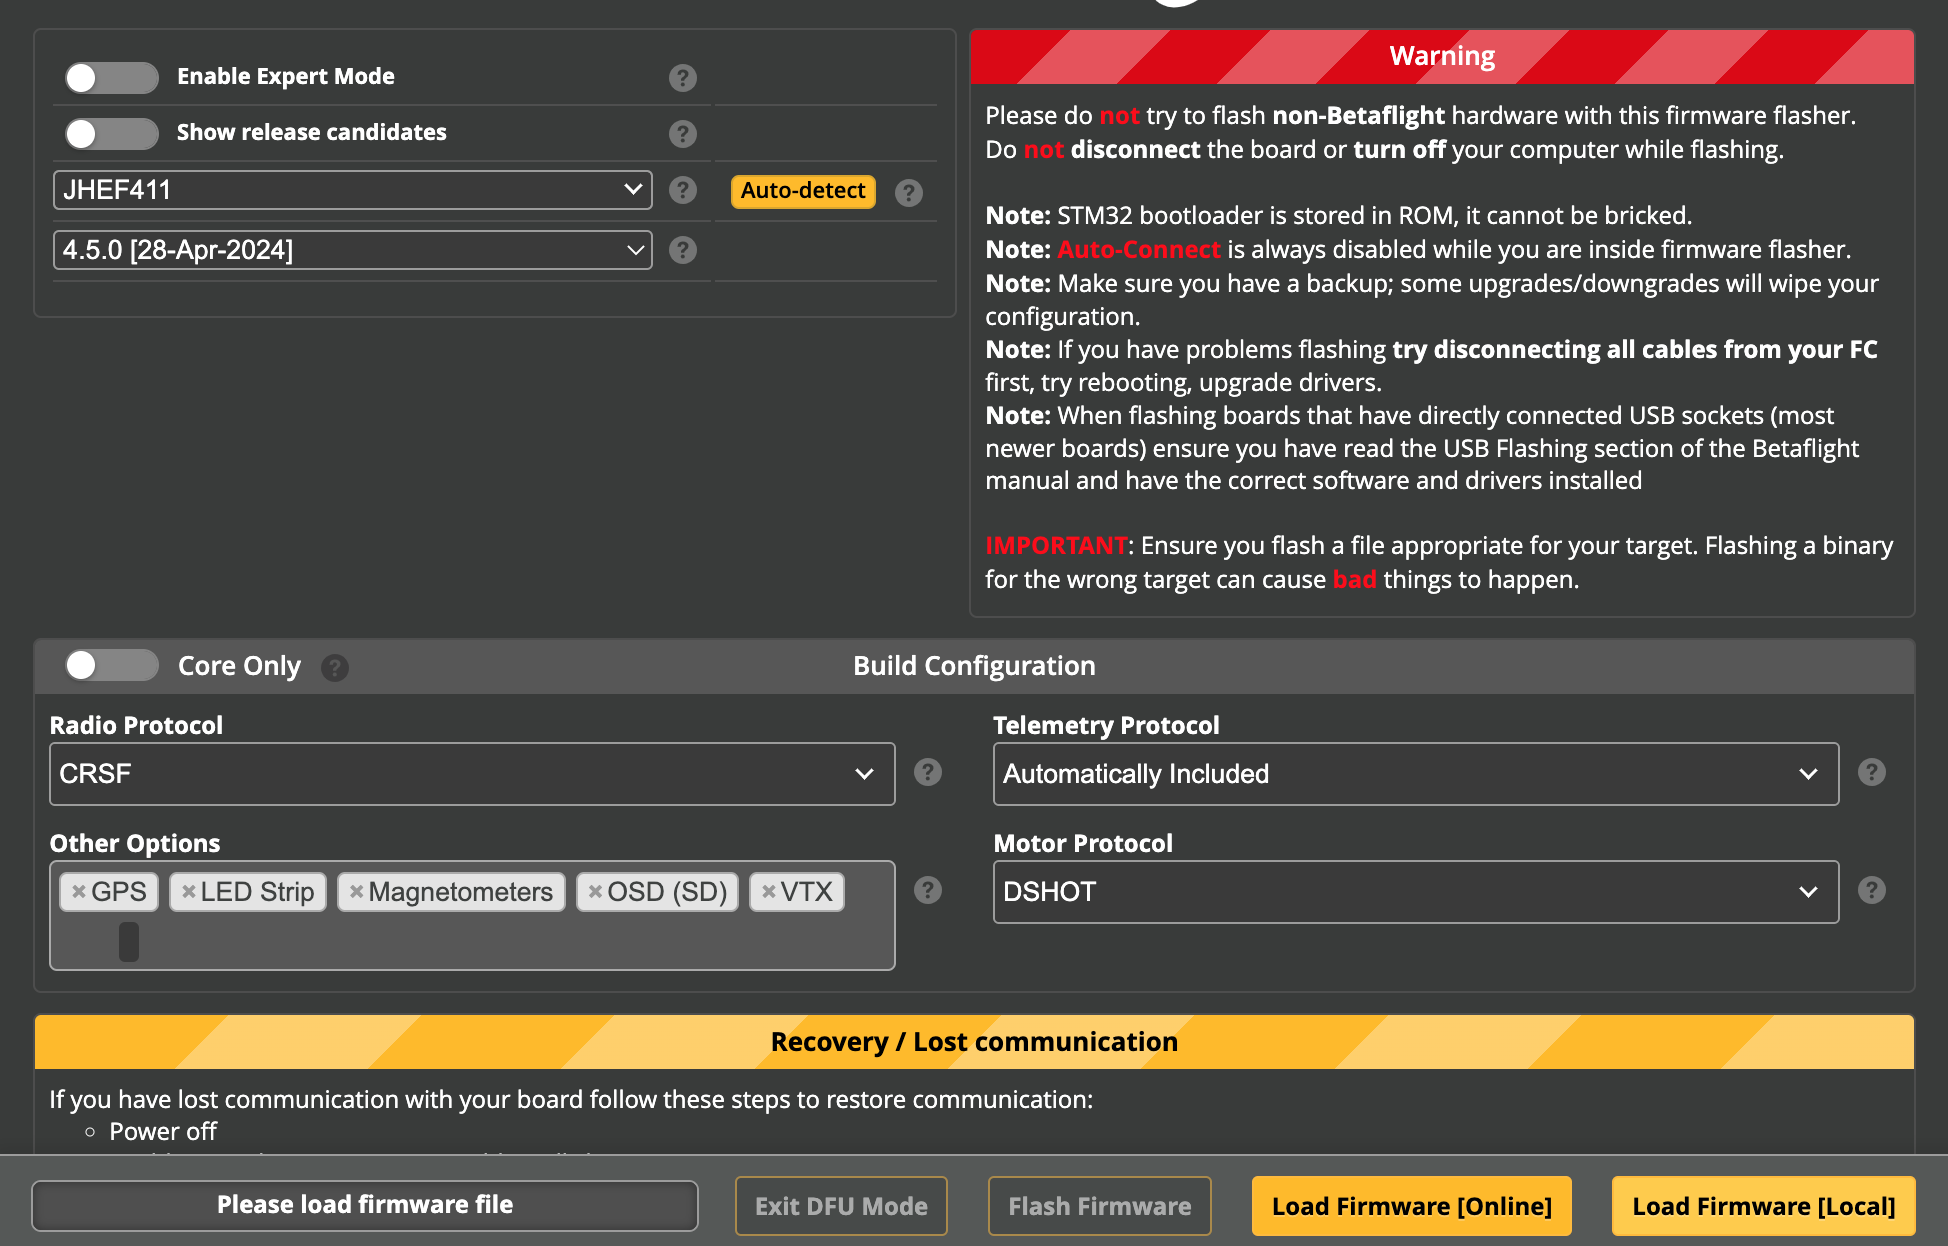
If you're happy that everything is OK, click Load Firmware [Online], and wait for the firmware to build and download.
Then click Flash Firmware.
A dialog to save the current configuration as a diff file is provided in case you didn't do this already.
Once the firmware is flashed, re-connect, calibrate your accelerometer, and re-configure your settings.
Generally, we recommend full manual re-configuration. When the flash is from the same point version, usually it's OK to import a saved Preset, or paste a Diff. Parts of a diff can also be selectively pasted into the CLI, eg the VTX Table, or the modes and aux settings. Do not copy and paste data from the profiles or master sections of a dump unless you know what you are doing.
After flashing, always check that every setting is 'as it should be', before test flying. Your first test flights should be cautious and in a safe environment.
Flashing Release Candidate firmware builds
Release Candidates are special firmware builds that are provided to test 'nearly completed' firmware. They are only available late in the development of a new firmware version, when we think it is almost ready. For example, 4.5.0-RC2 is the second RC version of Betaflight 4.5; it was released for testing on 08-Jan-2024. Usually these builds are stable. Developers really appreciate public testing of PR builds.
To see Release Candidates:
- Enable Expert Mode
- Enable 'Show release candidates'
- Choose
Release and Release Candidatefrom the new dropdown - Auto-detect to select the correct flight controller
- Choose the Release Candidate version that you'd like to flash
- Proceed as for basic flashing, above.
Flashing Development builds
Development builds contain the most recent changes made to the firmware.
This option lets you test out a new feature, or try out a significant change to the code, as soon as it is added to the master branch. If, for example, Betaflight 4.5 is the current release version, the development versions available in the list will be 2025.12.0, and the latest code for the most recent update branch for 4.5, e.g. 4.5.3.
To see Development versions:
- Enable Expert Mode
- Enable 'Show release candidates'
- Choose
Developmentfrom the new dropdown - Auto-detect to select the correct flight controller
- Choose the Development version that you'd like to flash (RC's are there too)
- Proceed as for basic flashing, above.
Other 'Expert Mode' options
| Setting | Meaning |
|---|---|
| No Reboot sequence | Use this if your board is already in DFU mode |
| Flash on connect | (Hazardous) Immediately flashes the next board you plug in, without checking it's type or offering to make a backup |
| Full chip erase | Default is ON, and for good reason. See notes below |
| Manual Baud Rate | Default is good, but sometimes slower is more reliable |
Full chip erase completely wipes the NVRAM, deleting all your saved configuration data, and replaces it with new default values and the new data structure for the new firmware.
Full chip erase should only be disabled when you are 100% certain that the configuration data structure has not changed since the last flash, otherwise incorrect configuration values may be retrieved by the new firmware, with potentially disastrous results.
Build Configuration
In the Build Configuration section, the user selects the hardware support code that will be included in their firmware build.
There are four basic configuration groupings:
Radio Protocol
Select the receiver protocol used. The most common are:
| Protocol | Receiver |
|---|---|
| CRSF | TBS Crossfire or ExpressLRS |
| GHST | Immersion RC Ghost |
| SBUS | FrSky or Futaba |
EXPRESSLRS SPI receivers use the CRSF protocol and the main version number must match (eg an ELRS SPI receiver in Betaflight 4.4 and 4.5 will only work with ELRS 3.x in the Transmitter).
FrSky SPI receivers use SBUS or FPORT protocol depending on the receiver firmware used.
SPI configuration details are resolved via software (part of the configuration data). Some of the required information may be included in the flash via the board definition file.
Telemetry Protocol
Select the telemetry protocol you need. For CRSF, ELRS, FPORT or GHST protocols, this is included by default to simplify configuration.
Other Options
These are custom functions or features that you can add to the firmware.
| Option | Description |
|---|---|
| AKK (SA Fix) | SmartAudio patch for AKK hardware |
| Acro Trainer | Enable Acro Trainer support |
| Altitude Hold | Enable Altitude Hold Mode support. See #13816 |
| Batt. Continue | See #11084 |
| Cam. Control | Enable Camera Control |
| Dashboard | Enable external i2c OLED Display device (to be deprecated) |
| EMFAT (AutoRun, Icon) | Enable FAT emulation and icon for onboard flash or MSC |
| ESC Serial (SK) Inc. 4way | Enable SimonK and ESC Serial support for flashing via 4way interface |
| Flash Storage | 4.4 and earlier only. Enables Blackbox Flash Storage support. In 4.5, is auto-included via the FC config file. To manually add Flash to a 4.5 build, enter FLASH in Custom Defines |
| FrSky OSD | Enables FrSky OSD support |
| GPS | Enable GPS and GPS_PLUS_CODES |
| LED Strip | Enable 32 LEDs |
| LED Strip 64 | Enable 64 LEDs |
| Magnetometers | Enable magnetometer (compass) |
| OSD (SD) | Enable SD OSD (onboard MAX7456 required) |
| OSD (HD) | Enable HD OSD (eg DJI, HDZero, Walksnail) |
| PIN IO | Enable PINIO |
| Position Hold | Enable Position Hold Mode support. See #13975 |
| RACE PRO | see Betaflight 4.5 Release notes |
| Soft Serial | Enable support for Software Serial |
| Servos | Enable Servo support |
| VTX | Enable VTX |
| Wing | TPA mode PDS + Wing setpoint attenuation. See #14010 |
Motor Protocol
Select the Motor control (ESC) protocol to use. DShot is default.
Custom Defines
This field is only available in expert mode, and is intended for development and testing.
It allows the user to enter the coded 'name' for a 'hardware define', forcing that code to be included in the build. More than one define can be included, separated by spaces.
For example, the local build options -DUSE_RANGEFINDER -DUSE_ACCGYRO_LSM6DSO can be included as Custom Defines when making a cloud build with RANGEFINDER ACCGYRO_LSM6DSO.
For advanced users, the Defines page in our development section provides a list of Custom Define options available early 2024.
Select Pull Request or Commit
This field is only available in expert mode, and is intended for development and testing of yet to be merged code that is in 'Pull Request' status. This happens when a developer has proposed a change to the code base, and has put it up for testing.
It defaults to the latest commit (master), meaning the most recent commit of the selected firmware branch. The dropdown includes some recent commits if you want to go back a bit.
Each GitHub pull request has a unique ID. The user can include a specific, yet to be merged, Pull Request, over the top of master, by typing the number of the pull request, preceded by the # character. For example, to include Pull Request #13605, just enter #13605 in the Custom Defines field.
It is also possible to make a build from any previous point in time by entering the sha of the commit.
Troubleshooting
- Use a good quality data cable, not a power cable.
- USB hubs or OTG cables are sometimes needed with recent computers and in other cases they can cause issues.
- Try disconnecting all cables from your PC first, try rebooting, other ports, upgrade system drivers. Remove other USB connections.
- Try DFU mode (use boot button on FC while plugging in, use Activate Boot Loader / DFU button in setup tab or use bl command in CLI.)
- Sometimes peripherals on the flight controller such as receivers or GPS devices can hijack port communication, preventing entering DFU mode. These may require de-soldering.
- Linux needs configuration to allow flashing.
- MacOS or Windows do not need any drivers.
- If it still doesn't work try IRC Driver Fix or Zadig on Windows platform.
If your board peripherals are not recognized after flashing, please help us add the required configuration details. Some boards have inadequate file definitions, or the manufacturer has changed something on the board.
Reach out to us on our Discord server or create an issue in the Betaflight unified targets repo.
To get the required information follow this procedure:
- Flash your board with the Core Only switch enabled
- Go to the CLI tab and click the Submit Support Data button.
- With this generated support ID we should have all the required information, but we would then need your help to confirm a fix..
Checking the Build
The Show Log link will open the build log and show the defines being applied to the build, the code build outcome, and the file size details.
The log file includes a full string for use when flashing the same build locally is provided, both for Docker and Make.
At any time after flashing, the log can be re-loaded using the log button at the lower right side of Configurator's SSetup page. A summary of the included build options can be displayed using the nearby Options button.
Local Flashing
If you have a local build environment and can make hex files, or you just have a hex file to flash, it can be flashed directly.
For 4.4 and 4.5, the hex file must be custom-built or pre-built with all the hardware options already included. There is no need to choose a board in the drop-down, or set any options, because all the required defaults and options exists in the custom hex file. Note that the configuration file only contains the default configuration values; the user will have to check and update the settings before flying.
Hovering your mouse over 'Loaded Online Firmware' in the Flashing Tab, before actually flashing the code, allows downloading the firmware hex file to your computer for local flashing later on, if needed.
Previously an MPU-specific hex file was used, and the user had to ensure that the board was selected, so that the board-specific hardware details would be flashed after the hex.
To flash local development firmware with optional custom configuration use the Load Firmware local button to load board configuration or click Auto-detect or when in DFU mode select a board manually.
If, when flashing older MCU-generic firmware, and if you have a local configuration file, load it first, then use the same button again to load the local hex file.